With winter knocking on our door, most guys are starting to put their bass gear away for the year. I'm not one of those individuals but I do use this time of year to clean my reels, rods, re organize my tackle, etc. Now that daylight fades at 5:00pm, I'm forced to do most of my fishing on the weekends. This leaves a lot of time during the week to do the projects that I fail to do during the warmer months.
Over the last couple months I've had a few guys ask me who I have clean my reels? In which I respond, "I clean my own reels." I then tell them that there's really no sense in sending your reels off to have them cleaned for $10-20 a piece, when you have all winter to do things for yourself. So in order to help a few guys save a little money, here's how I clean my reels.
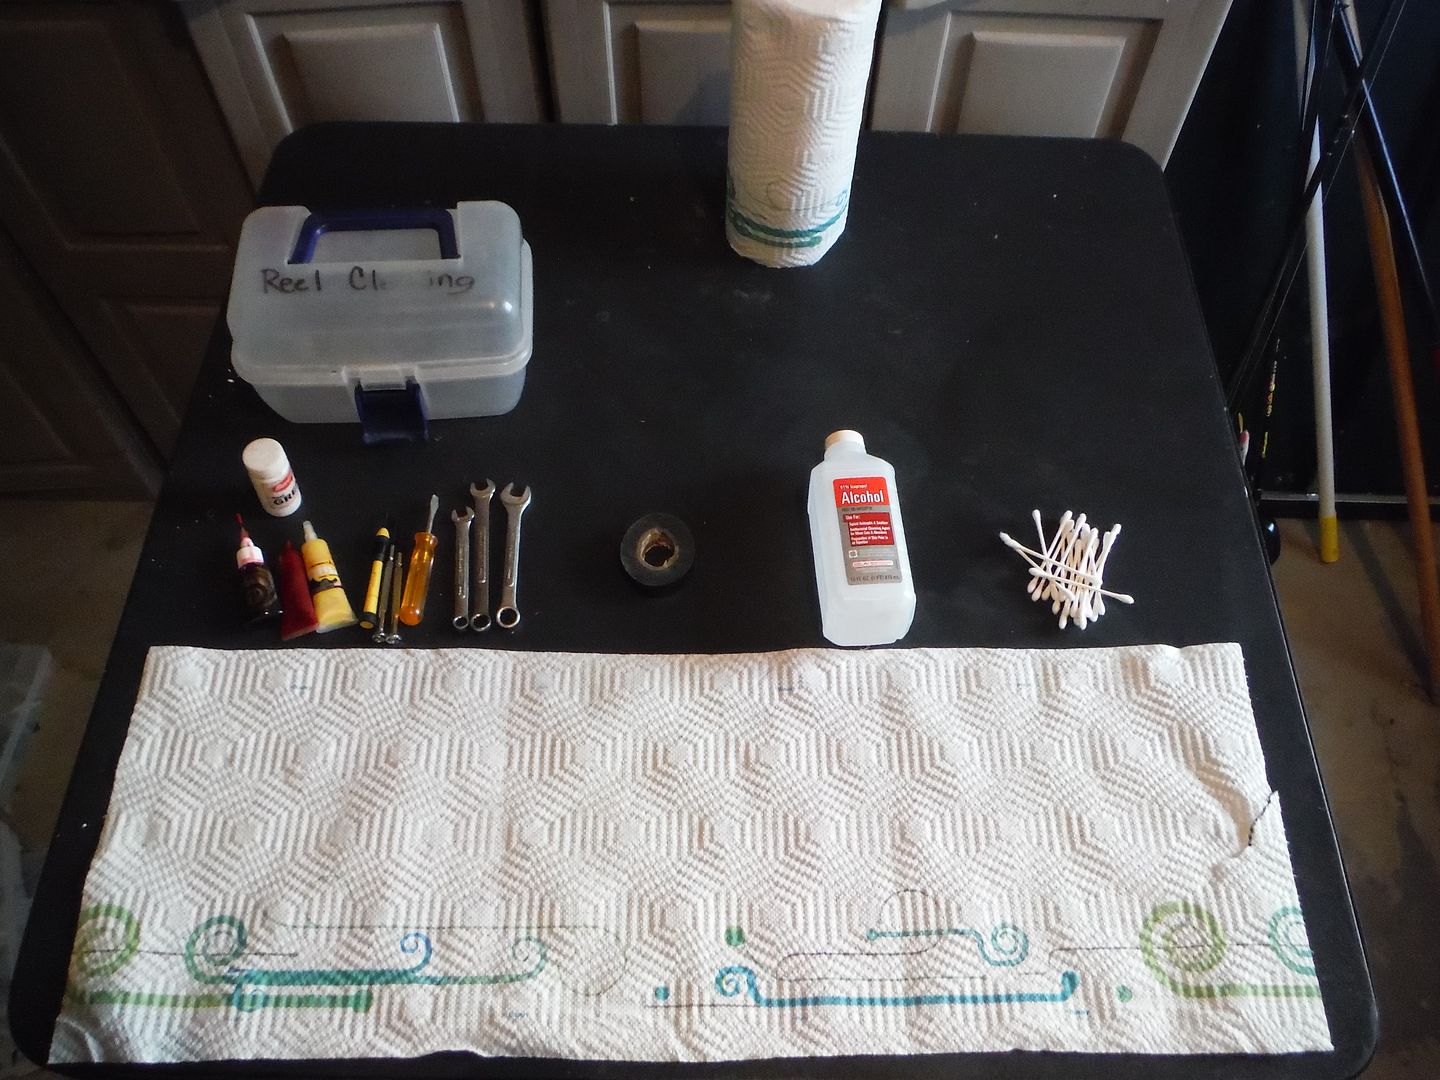
The first thing you'll need is the right set of tools. You will need the following:
- 10 mm Wrench
- Set of small screwdrivers
- Electrical tape
- Isopropyl Alcohol
- Cotton Swabs (Q-tips)
- Paper Towels
- Oil
- Grease
- Reel Schematics Chart.....Find it Here
- A clean open space to work
- A reel (In this case a Shimano Chronarch)
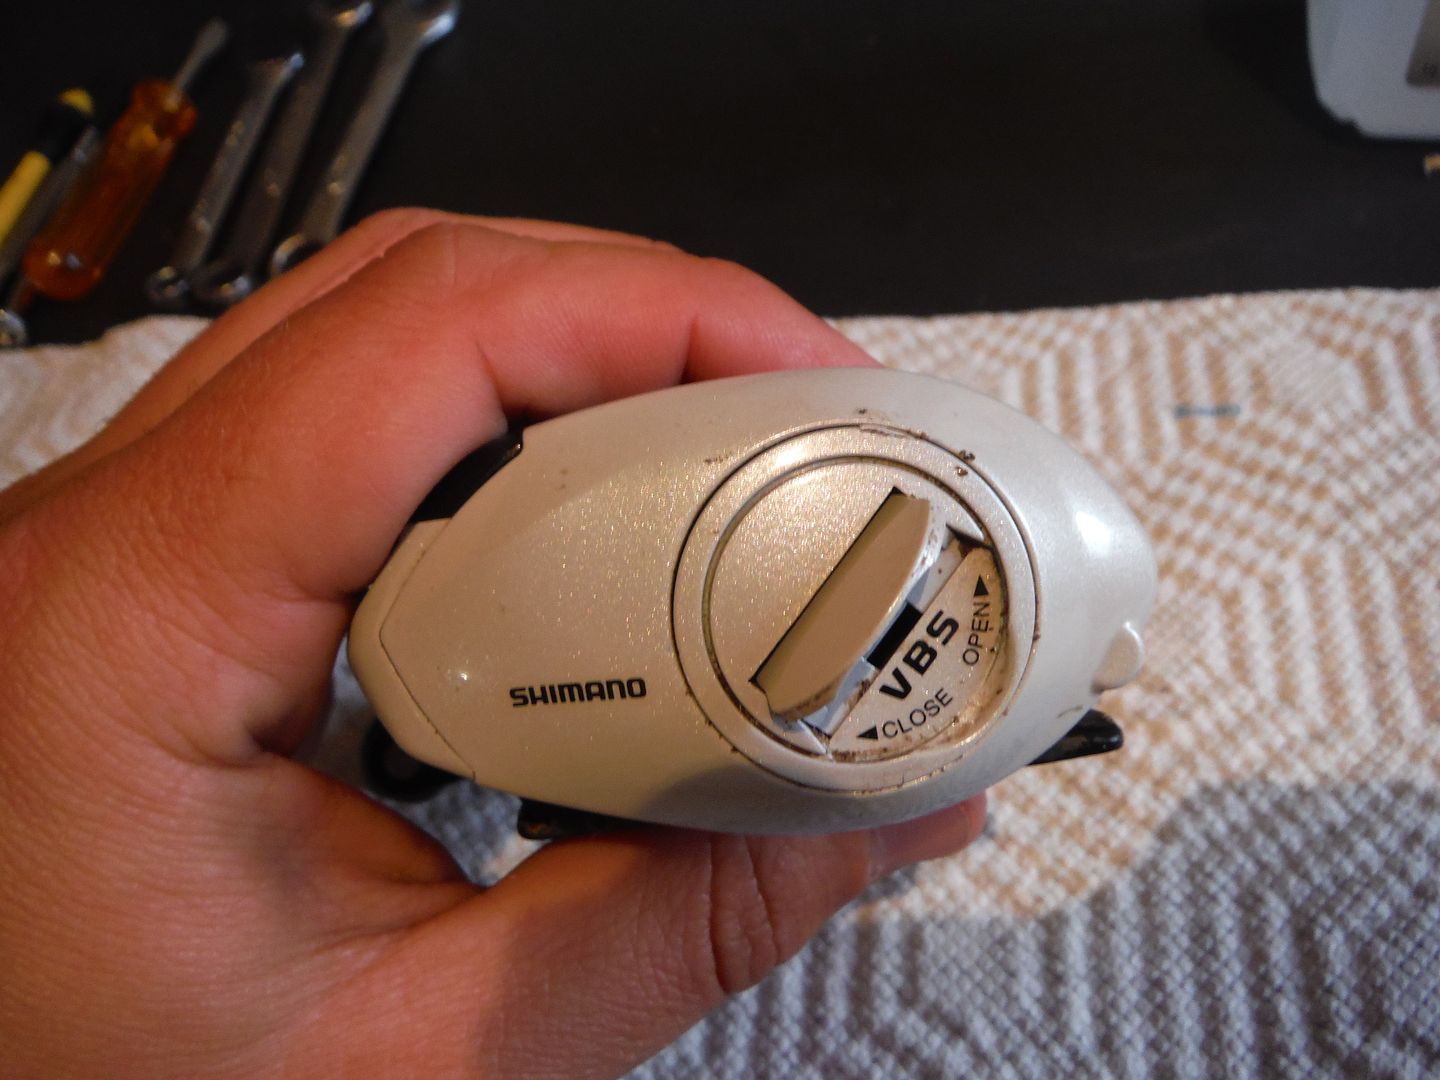
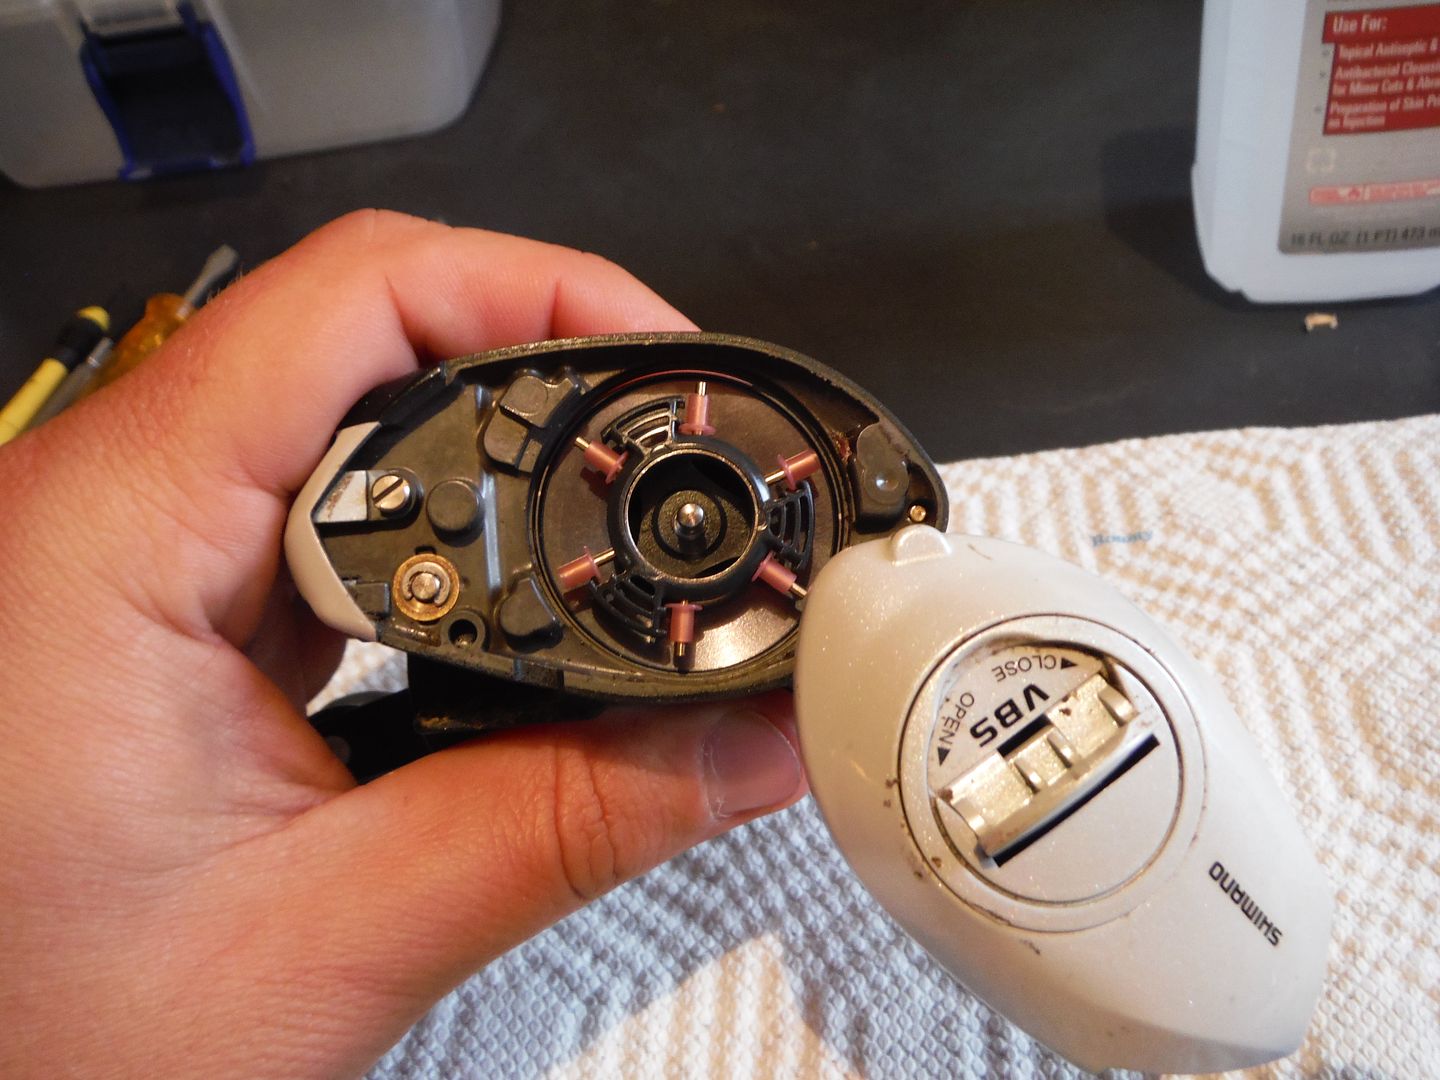
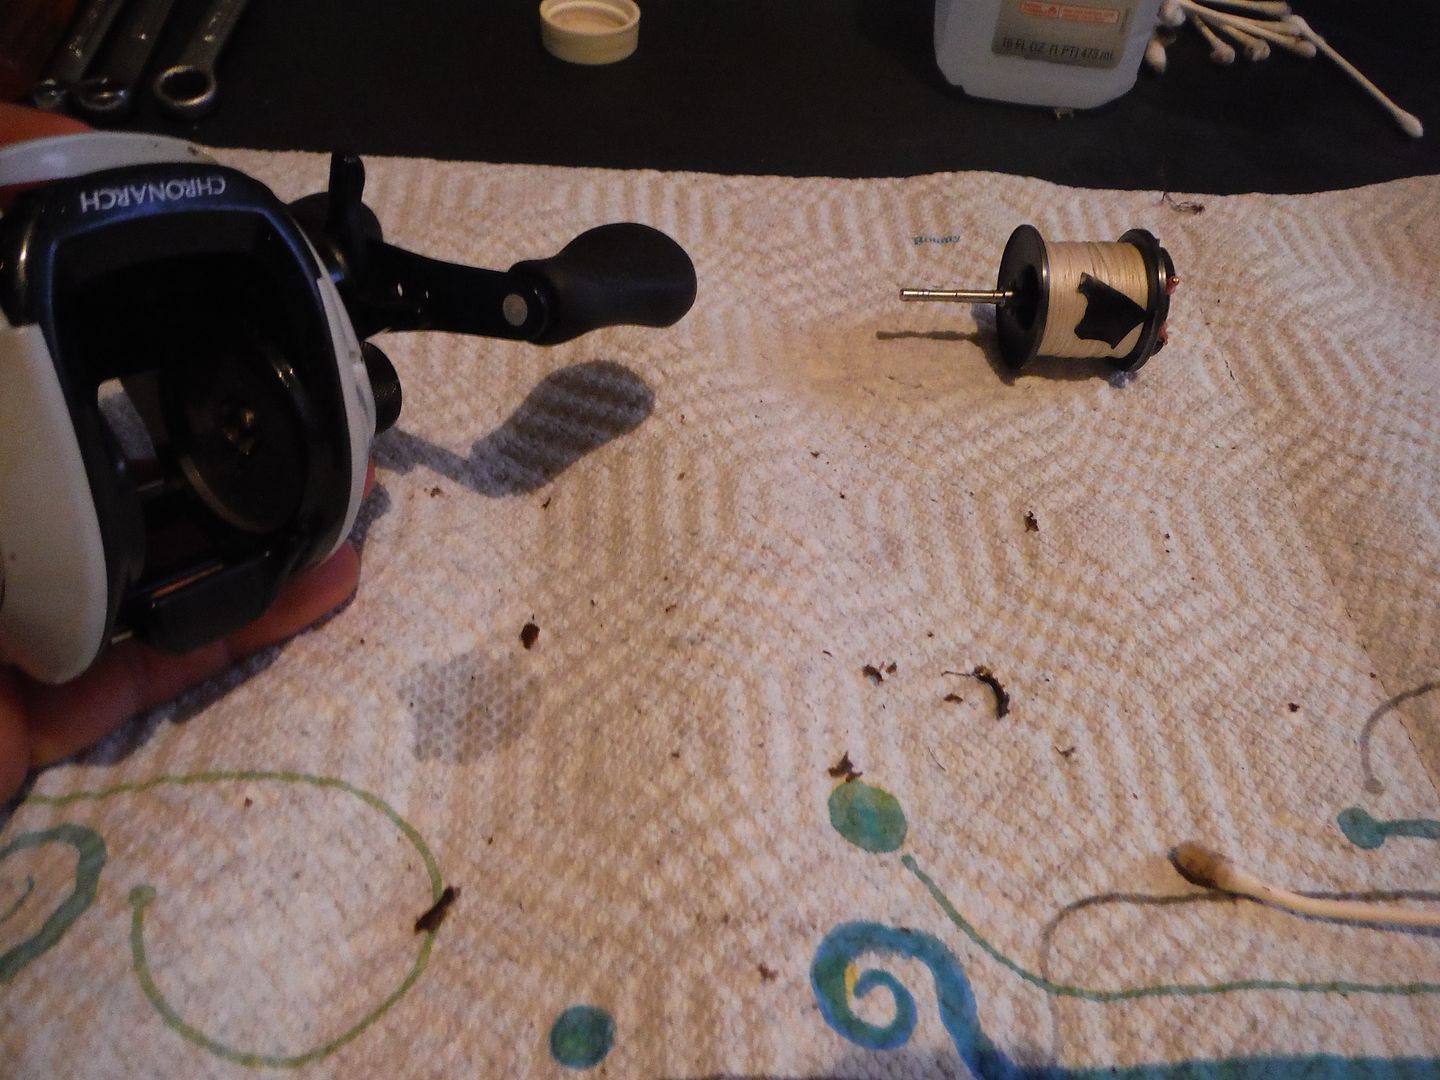
After you have all of this lined out and ready to go its time to get your reel.......and lock your dog/cat/small children out (nothing like having your reel completely disassembled when someone or something decides to bump the table). Take your reel off of your rod and set it down on the white paper towel. The paper towel will help to collect dirt, dust, sand, algae, etc. as well as any parts that may get away from you during disassembly. The first thing I do is tape the line to the spool, here I use the electrical tape. At this point your done with the electrical tape so you can set it aside. The second step is to remove the left side plate. To do this on my reel you have to flip up a tab and rotate it counter clockwise. Most reels will have a very similar mechanism to unlock the side-plate.
Once the side plate is open you will see your spool and mechanical brakes, simply grab the shaft and pull the spool out and lay it onto your paper towel.
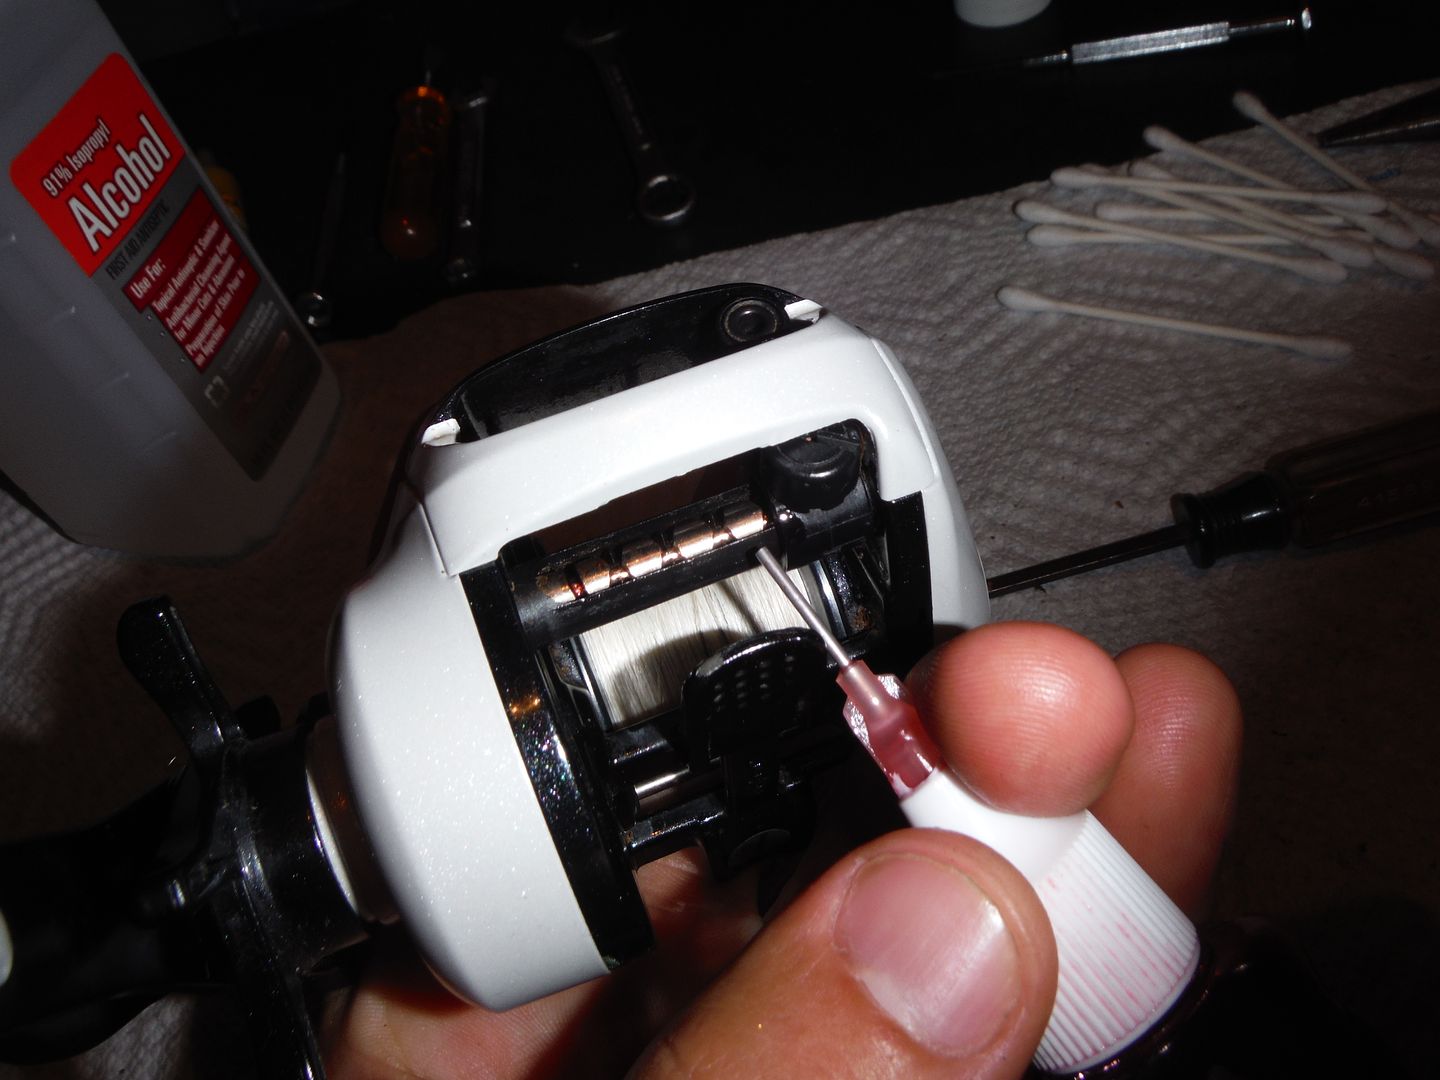
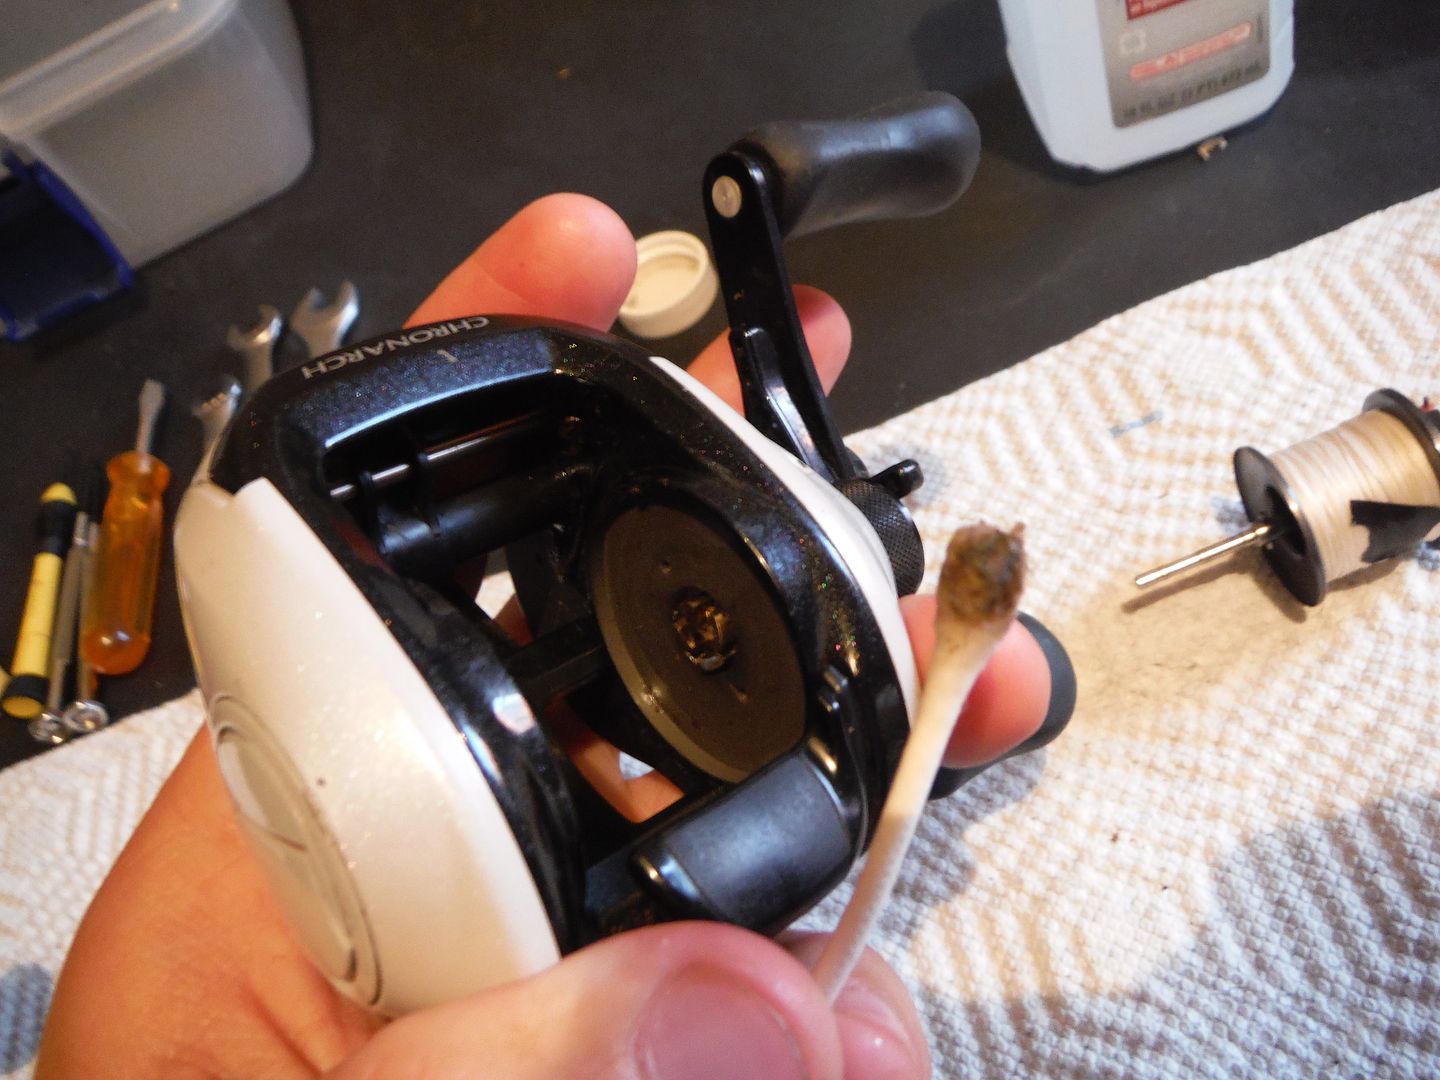
Now its time to break out the cotton swabs and Isopropyl Alcohol. I chose alcohol as my cleaning agent for a couple reasons. The most important of which is that it evaporates quickly, leaving behind little to no residue, and requires no drying. I'm sure there are reel cleaning agents out there, but I don't use them because I see no point in it. I simply fill the cap of the alcohol bottle with alcohol and then dip the cotton swabs in it. I then swab the reel until I feel confident that I have removed all of the "gunk." If your reel is as dirty as mine was, it may be a good idea to start with a paper towel dipped in alcohol to remove the majority of your "gunk" before using the cotton swabs............or go through half a box of swabs like I do.
Here you will spend a significant amount of time getting into all of the nooks and crannies of the reel. I probably spent around 20 minutes and went through 20 cotton swabs in the process.
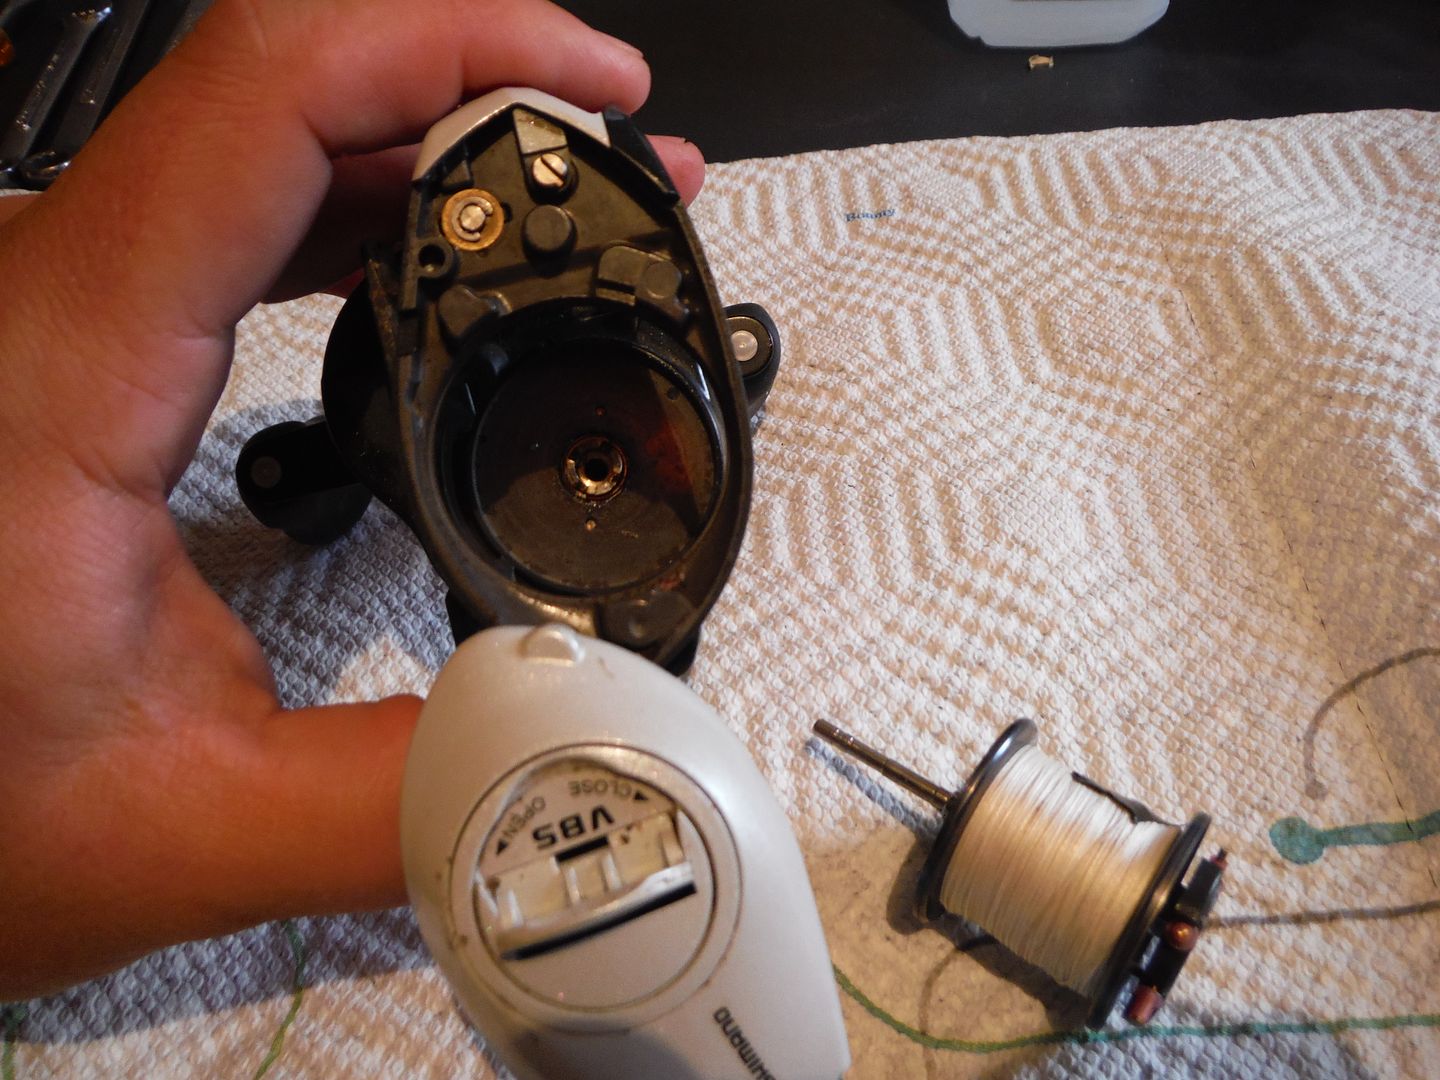
Once you have cleaned your reel to your liking its now time to move onto the other side plate of the reel. This side plate requires tools and has a lot of parts so pay close attention to what you do. As I begin to remove parts I place them in a row along the top edge of the paper towel in order as they come off. For those of us with bad memory, this is one sure way to keep track of what goes on in what order.
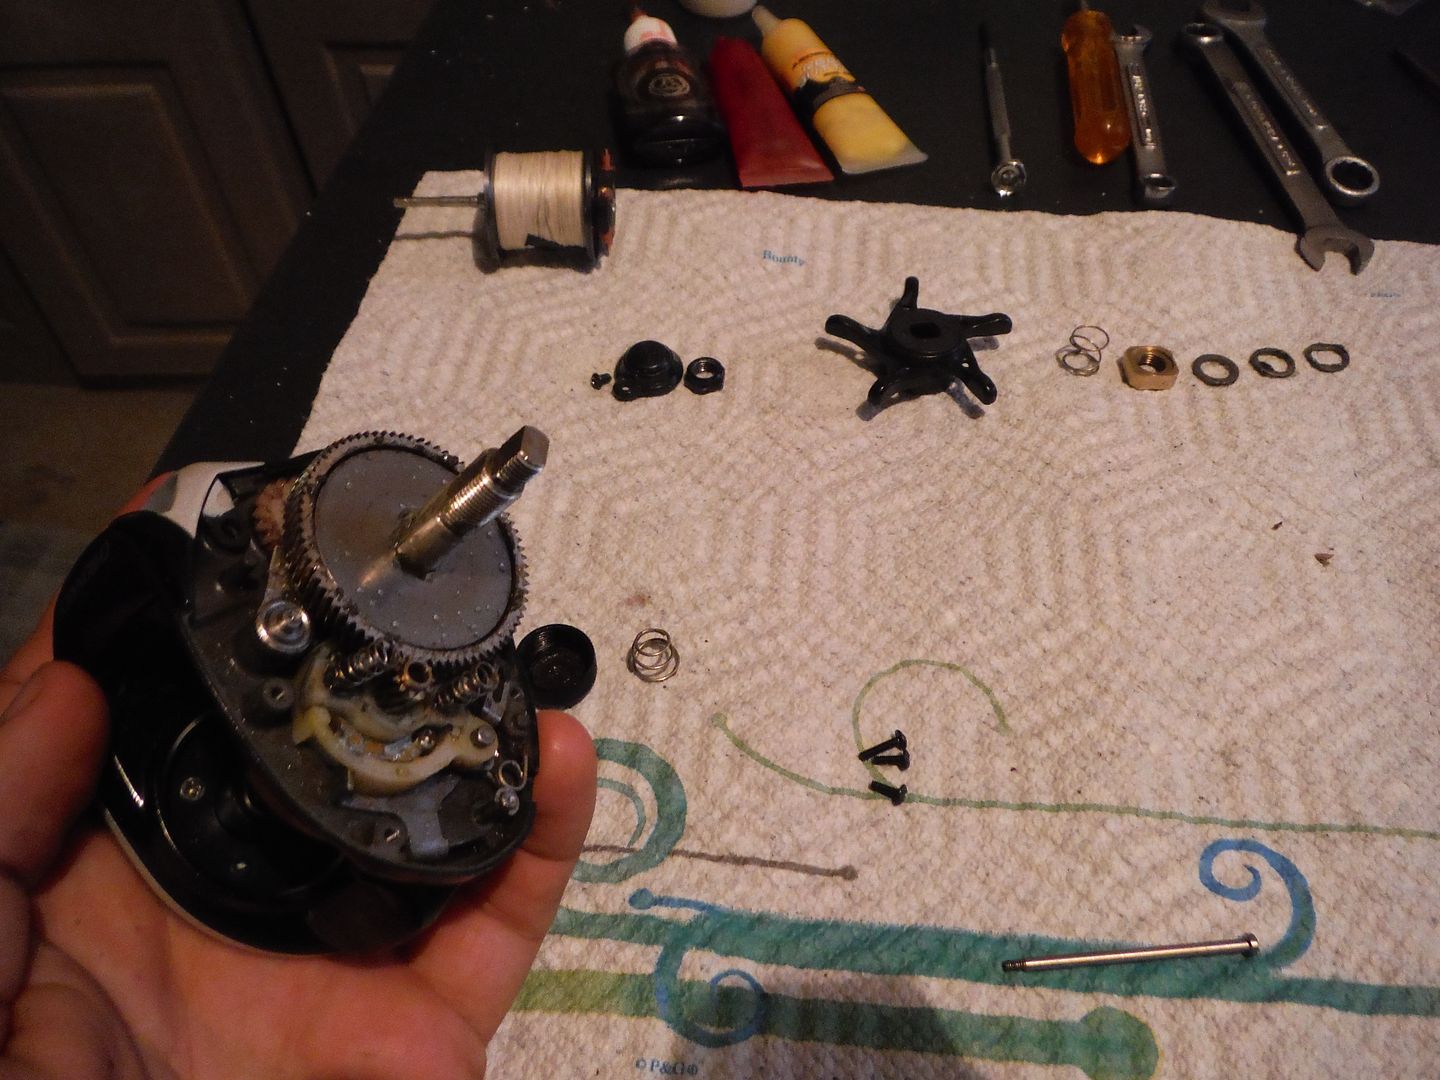
Start by grabbing a small screwdriver to remove the screw and cap off of the drive shaft of the reel. Set the cap down in a position where you can begin to line the other parts up in order behind it.....top left or right corner of paper towel. I started in the top left and worked my way right. It's the way we read so It was just habitual to me, feel free to do it however you like though. One helpful thing you can do is take pictures as you remove parts, this will help you get the reel back together if you do have an accident. Now grab your 10mm wrench and remove the nut. From this point forward different reels will have different parts.....or at least that has been my experience. For this exact reel I removed a washer, drag star, spring, another nut, and 3 washers while laying them all out in order. (See above picture) Now at this point you will have all of your parts off of your reel all the way down to the side plate. Now you can remove the three screws holding the side plate on, they are located around the edge of the side plate. Try to gently pull the side plate off while keeping the reel as level as possible. (drive shaft will be pointing upward.....picture above) If your side plate does not come off easily start looking for other screws that are holding the side plate on. On the Shimano Chronarch there is a small screw on the inside of the reel, where the spool sits, that holds the side plate to the reel frame. Once the last screw is removed the side plate should come off. (If this does not work on your reel check your schematics to see where the other screws are) At this point your reel will look like the picture of mine above. Continue to KEEP THE REEL LEVEL. If your reel tips you may have to do some minor reassembling. Most of the time the small springs ("Yoke/Turnkey Pawl Springs) will fall out, just put them back onto their shafts. However, much worse can happen if you tip your reel, so do your best to keep your reel upright and level. Look around to make sure your dog/cat/small child hasn't wandered into your work space. (I'm sure that's humorous to some, while others just looked over their shoulder to make sure the coast is clear.)
At this point I will not remove any other parts, you should not disassemble your reel any further unless you really want to box it up and send it off to be rebuilt. I have completely disassembled reels in the past and am confident enough to do it now, but in the process I have effectively killed a half dozen reels.....call it a stiff learning curve. I do not want this blog post to be the end of a dozen reels, so please don't go any further unless you feel 100 percent confident you can put it back together. This is all the further you will need to go to clean and re lubricate your reel. At this point you will need to get the alcohol and cotton swabs back out and remove any old grease, dirt, oil, moisture, etc. Make sure to clean the drive gear as much as possible, because you will be re lubricating it soon. Its the largest gear in your reel, so it should be easy to find.....if your having troubles continue reading and look at the pictures below.
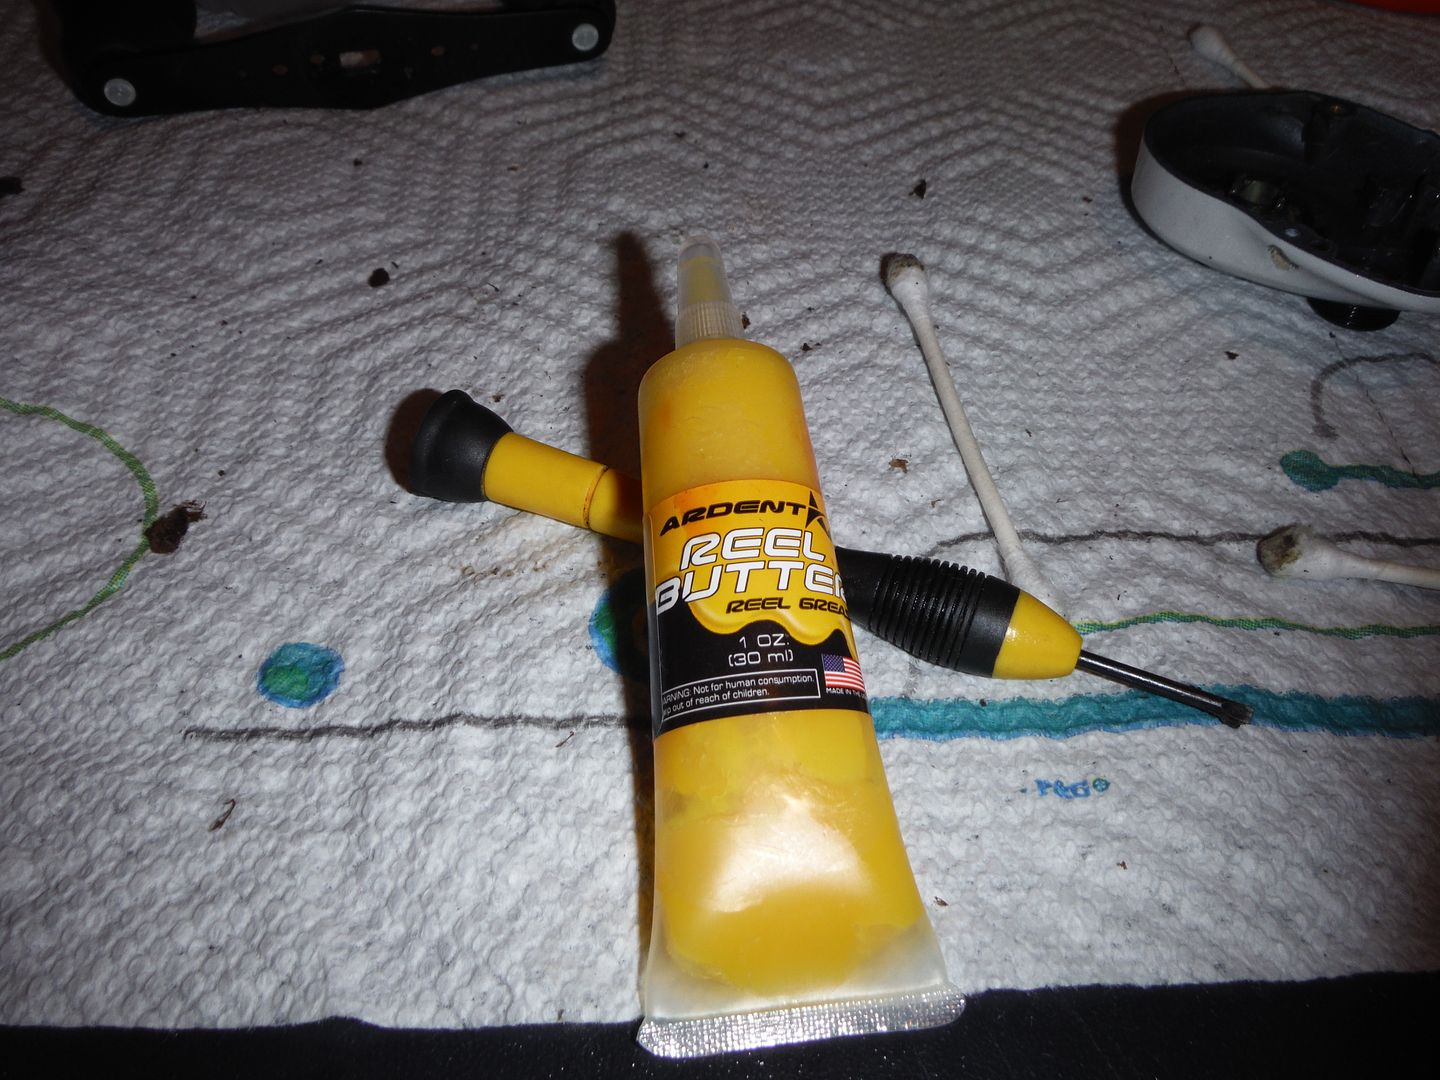
Once you have the reel completely dry and clean its time to re lubricate your reel. I start off with the grease first. I use two brands of grease and oil, ardent and quantum. I bought them to experiment and see if I liked one over the other, but as far as grease is concerned I have no favorite. Pictured above is
Ardent's Reel Butter. Take your grease of choice and lubricate the drive gear as shown below.
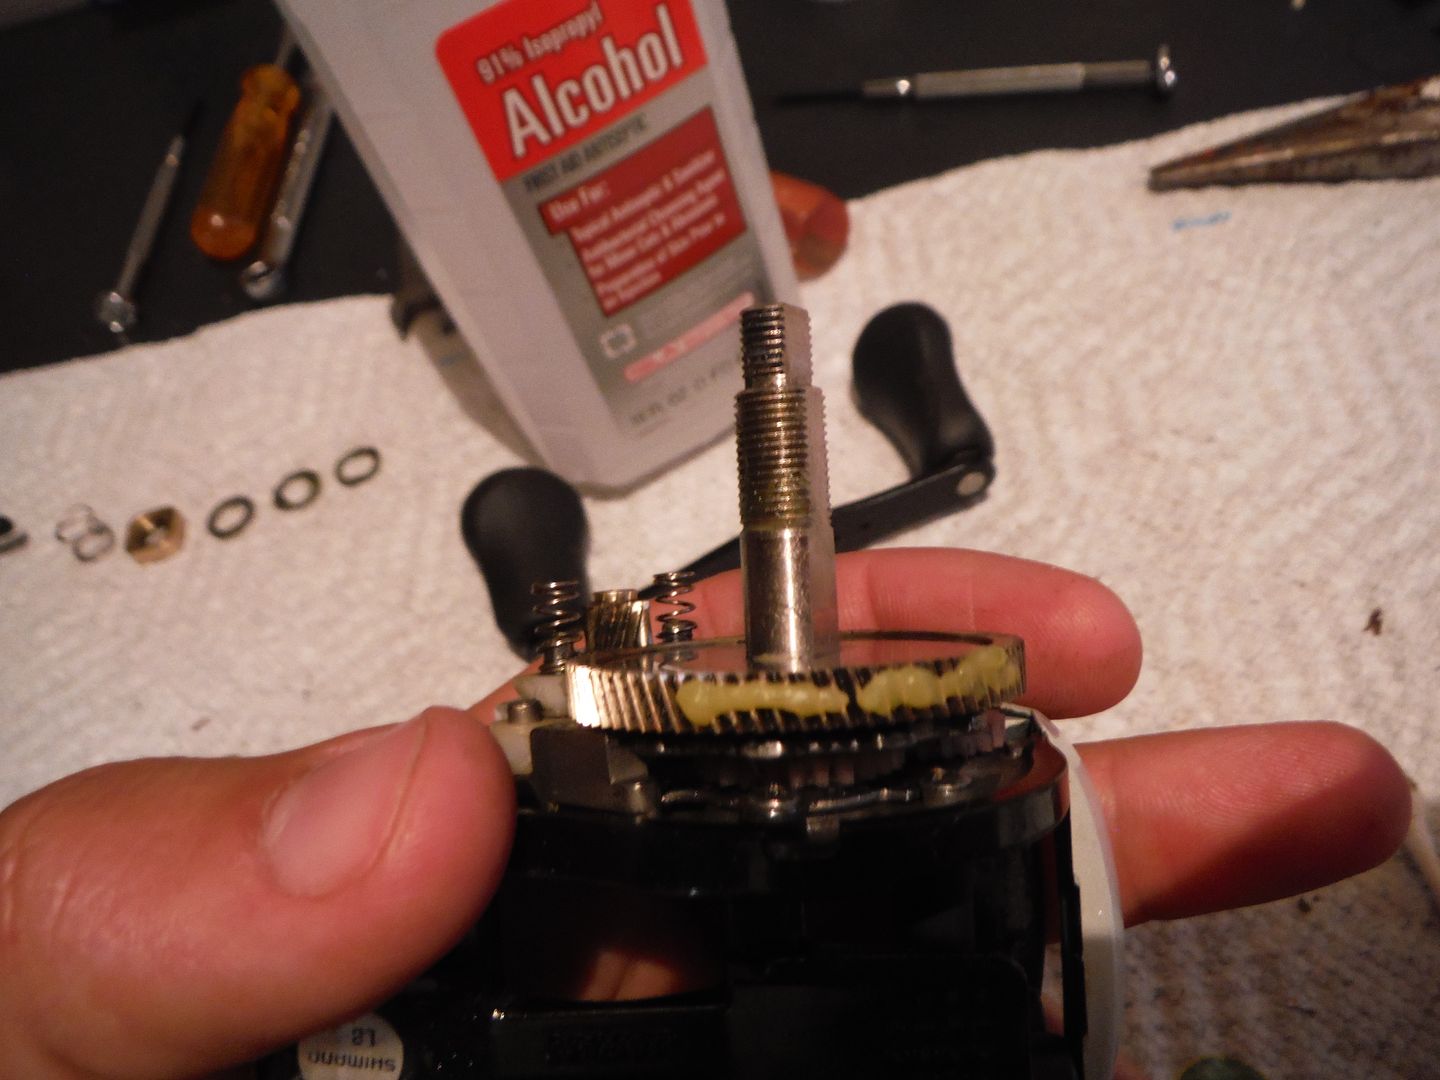
Now here is where you will have to make a decision of your own, do you lubricate the whole gear or do you follow other guidelines such as 3/4 of the gear, 1/2 of the gear? There are dozens if not hundreds of self proclaimed pros at cleaning reels, and it seems like everyone lubricates their reels differently. Some people think they are protecting their gear more by lubricating it heavily, however others lubricate lightly as to ensure a higher performance. I'm no pro but I do have a preference. I prefer to use a light coating of grease rather than to over grease my gears. Your reel will feel smoother and your handle will turn much more freely with a lighter coating than if you give the gear a heavy coating. (This can be tested by assembling your reel and then spinning the handle and then letting go. Reels with light lubrication will continue to spin while other, more heavily greased reels will stop soon after you release the reel handle.) Excess grease will also spin off and land on other parts that do not need to be greased. Excess grease will also trap sand, dust, dirt, etc inside of your reel and wear on your parts. Enough on that though. I simply lubricate 2/3 of my gear and then spin it around a few times to evenly disperse it among its groves.
While you have the grease out go ahead and grease around the clutch plate, the metal plate near the bottom of the reel. See above pic. Then with a cotton swab remove all excess grease off of the drive gear and the clutch plate. At this point you should be done with the grease, and now its time to use oil. Earlier I mentioned that I bought a variety of brands of grease and oil to try and see which ones I preferred. I mentioned that I did not have a favorite in grease, well the same cannot be said about oil. I did develop a favorite,
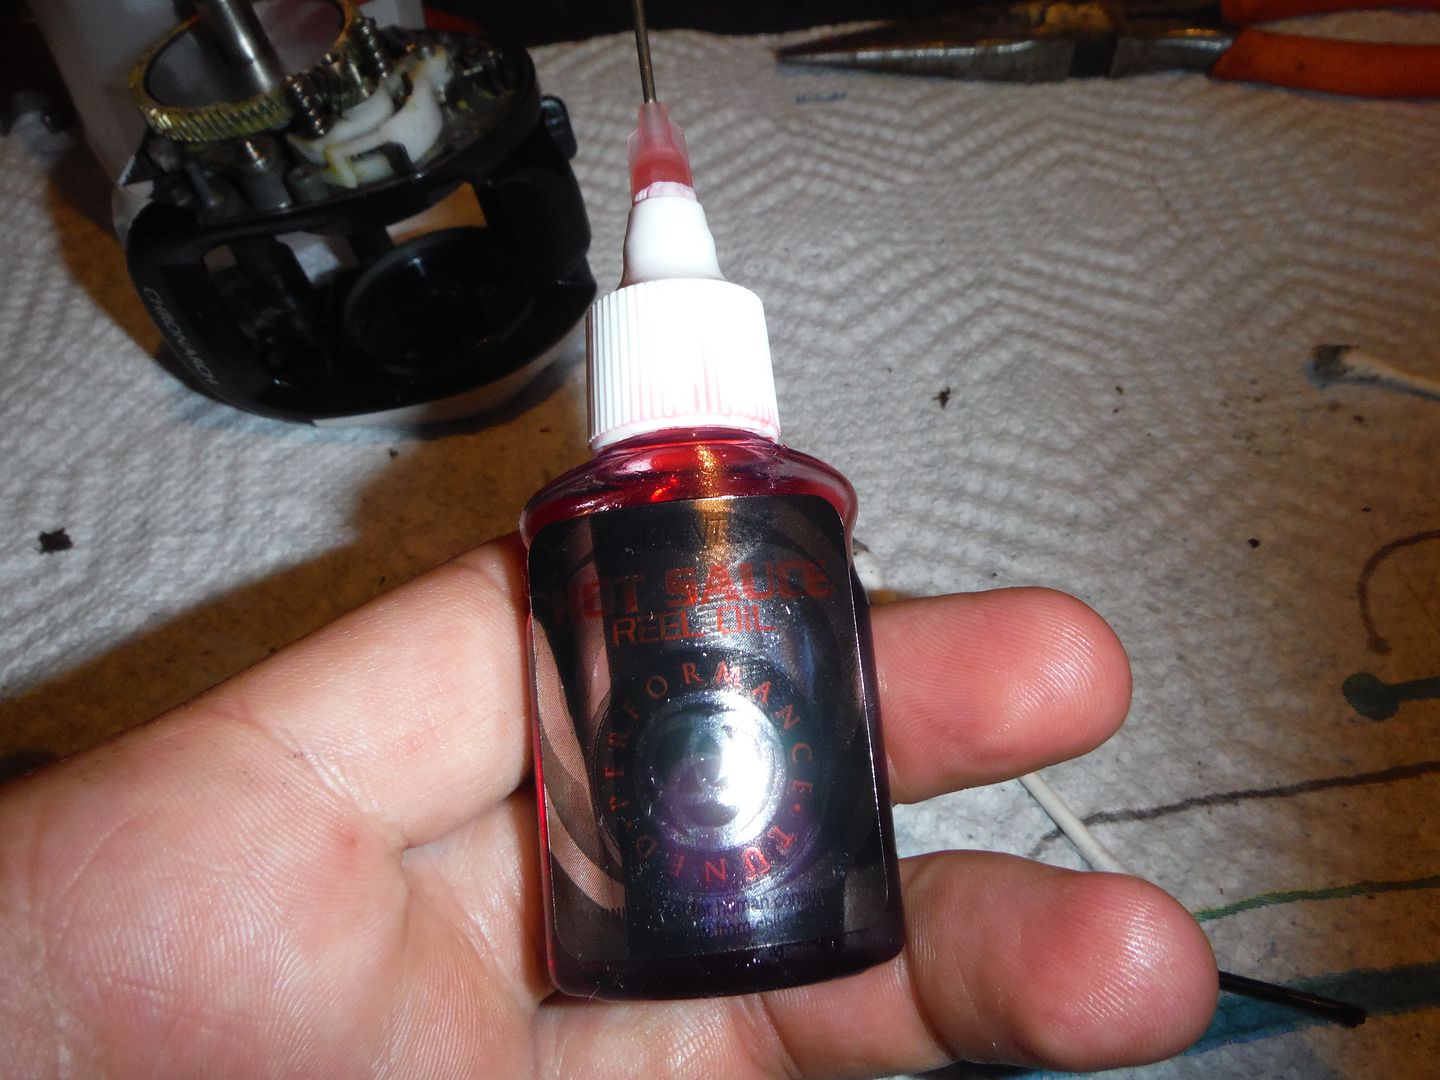
Quantum's Hot Sauce Reel Oil. I have found that this oil will stay on metal longer than its competitors. It lubricates the metal parts even when they have been exposed to water. (Rain or even the accidental drop in the water) Quantum claims that it forms a molecular bond with the metal.
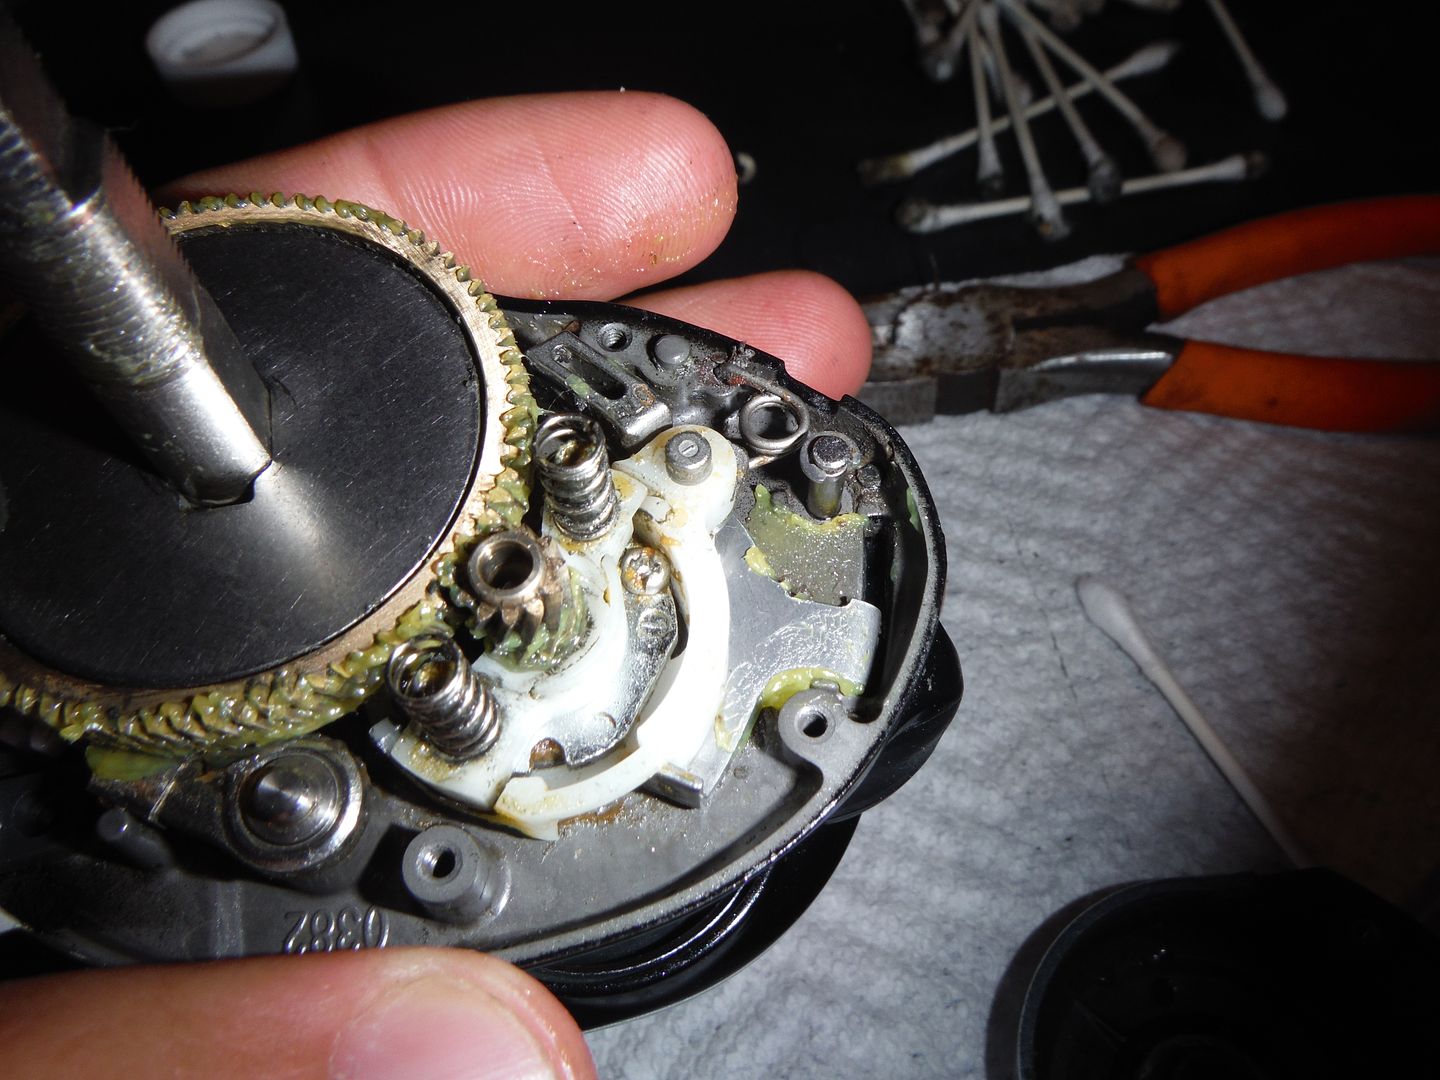
Before reassembling the reel go ahead and re lubricate the bearings with one drop of oil. Bearings will look like small metal disks nearly 1/4" thick with a hole in the middle. I know that probably doesn't help a lot but there's one pictured below.
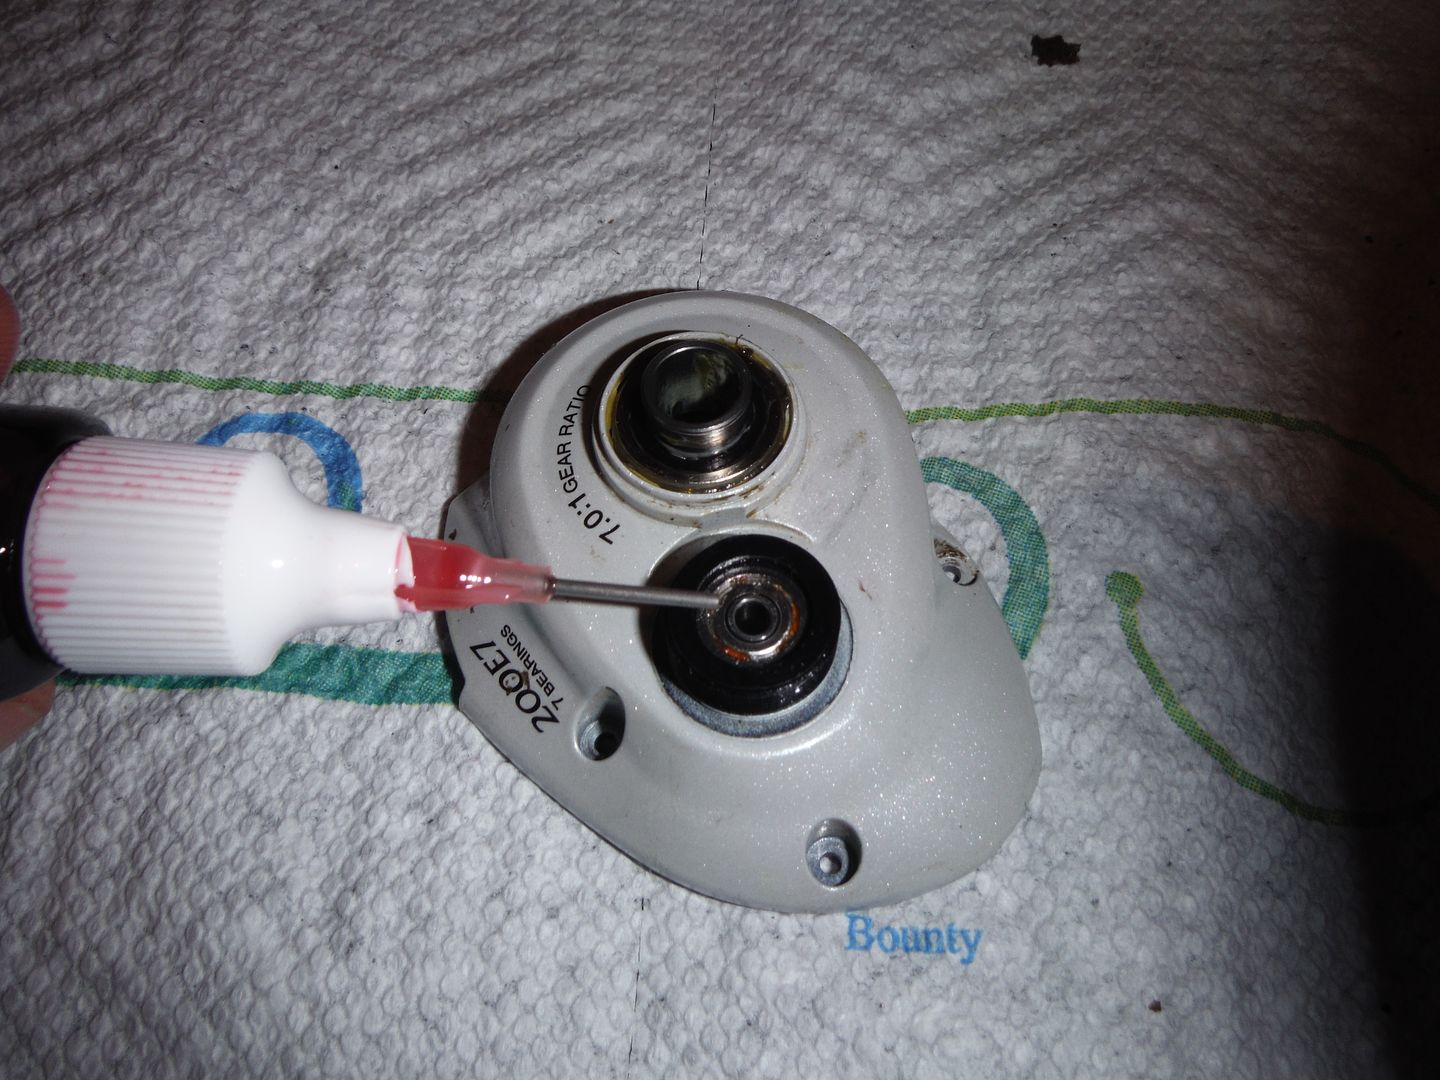
There will be a bearing on each side plate, which support the shaft that the spool sits on, however for now just do the right side plate bearing. Your next bearing will be on the inside of the right side plate where the drive shaft runs through. It won't look like the bearing under the tension knob, because it isn't encased. On the picture above the other bearing is located in the hole above where the oil needle is pointed. Give it a drop of oil and begin to reassemble the right side plate. Make sure that everything is seated level as it goes back on. Since you have your items in order from which they were taken off, it should be pretty easy to put back together. If you have problems check your reel schematics. With the right side plate, completely reassembled you are free to move on to re lubricating the left side plate.
Inside of the left side plate you will find a bearing that the shaft of the spool sits in, give it a drop of oil. Some spools will even have bearings inside of them so check there as well. Also on this side you will see the end of your worm gear, (Pictured below it in the brass colored washer) some of your higher quality reels will have a bearing here, give it a drop of oil as well. If it doesn't have a bearing you can still give it a shot of oil.
Your almost done now. Go ahead and place the spool back into position and close the left side plate. Now onto the worm gear (Silver gear in front of my oil needle seen in pic below), if its pretty clean and in good shape all you have to do is take a paper towel and remove the moisture and add a couple drops of new oil. However, if you can see dirt/grit inside of your worm gear you will have to remove the left side plate, the clip, brass washer, remove the line pawl cap (Black cap seen to the right of my oil needle below), line pawl (metal claw underneath the line pawl cap), and then remove the worm gear. Then with a tooth brush scrub the dirt out. While the gear is out of its sleeve, take a cotton swab and remove any dirt that is left behind. Then put it all back together in the opposite order.
Now for the final touch, flip the reel over and grab the handle. You will find that each handle sits on a bearing, give them a drop of oil too. Some reels will have plastic caps on the handles that keep dirt from getting into the bearings, if so remove cap and add a drop of oil to each handle.
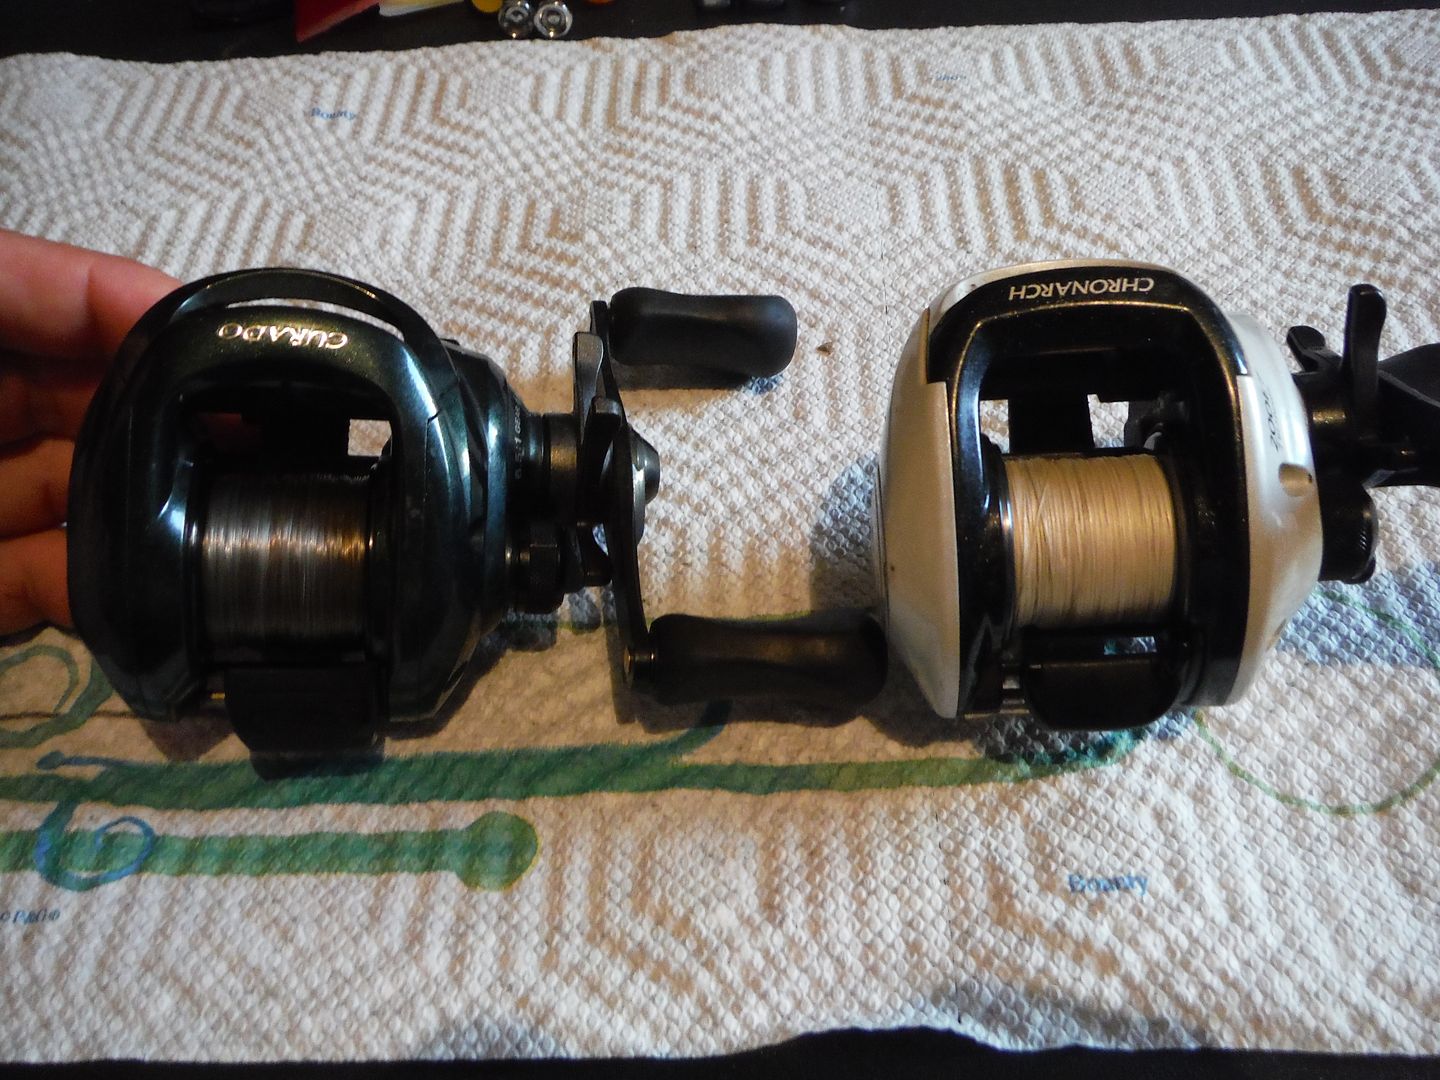
Now your all done and ready to hit the water again, whether it be next week or next spring. Unless of course your like me and you have another half dozen reels to clean. In that case you have a long night ahead of you.
I hope this has helped a few of you out, maybe even cured your cabin fever for a bit.
Thanks for reading.

No comments:
Post a Comment